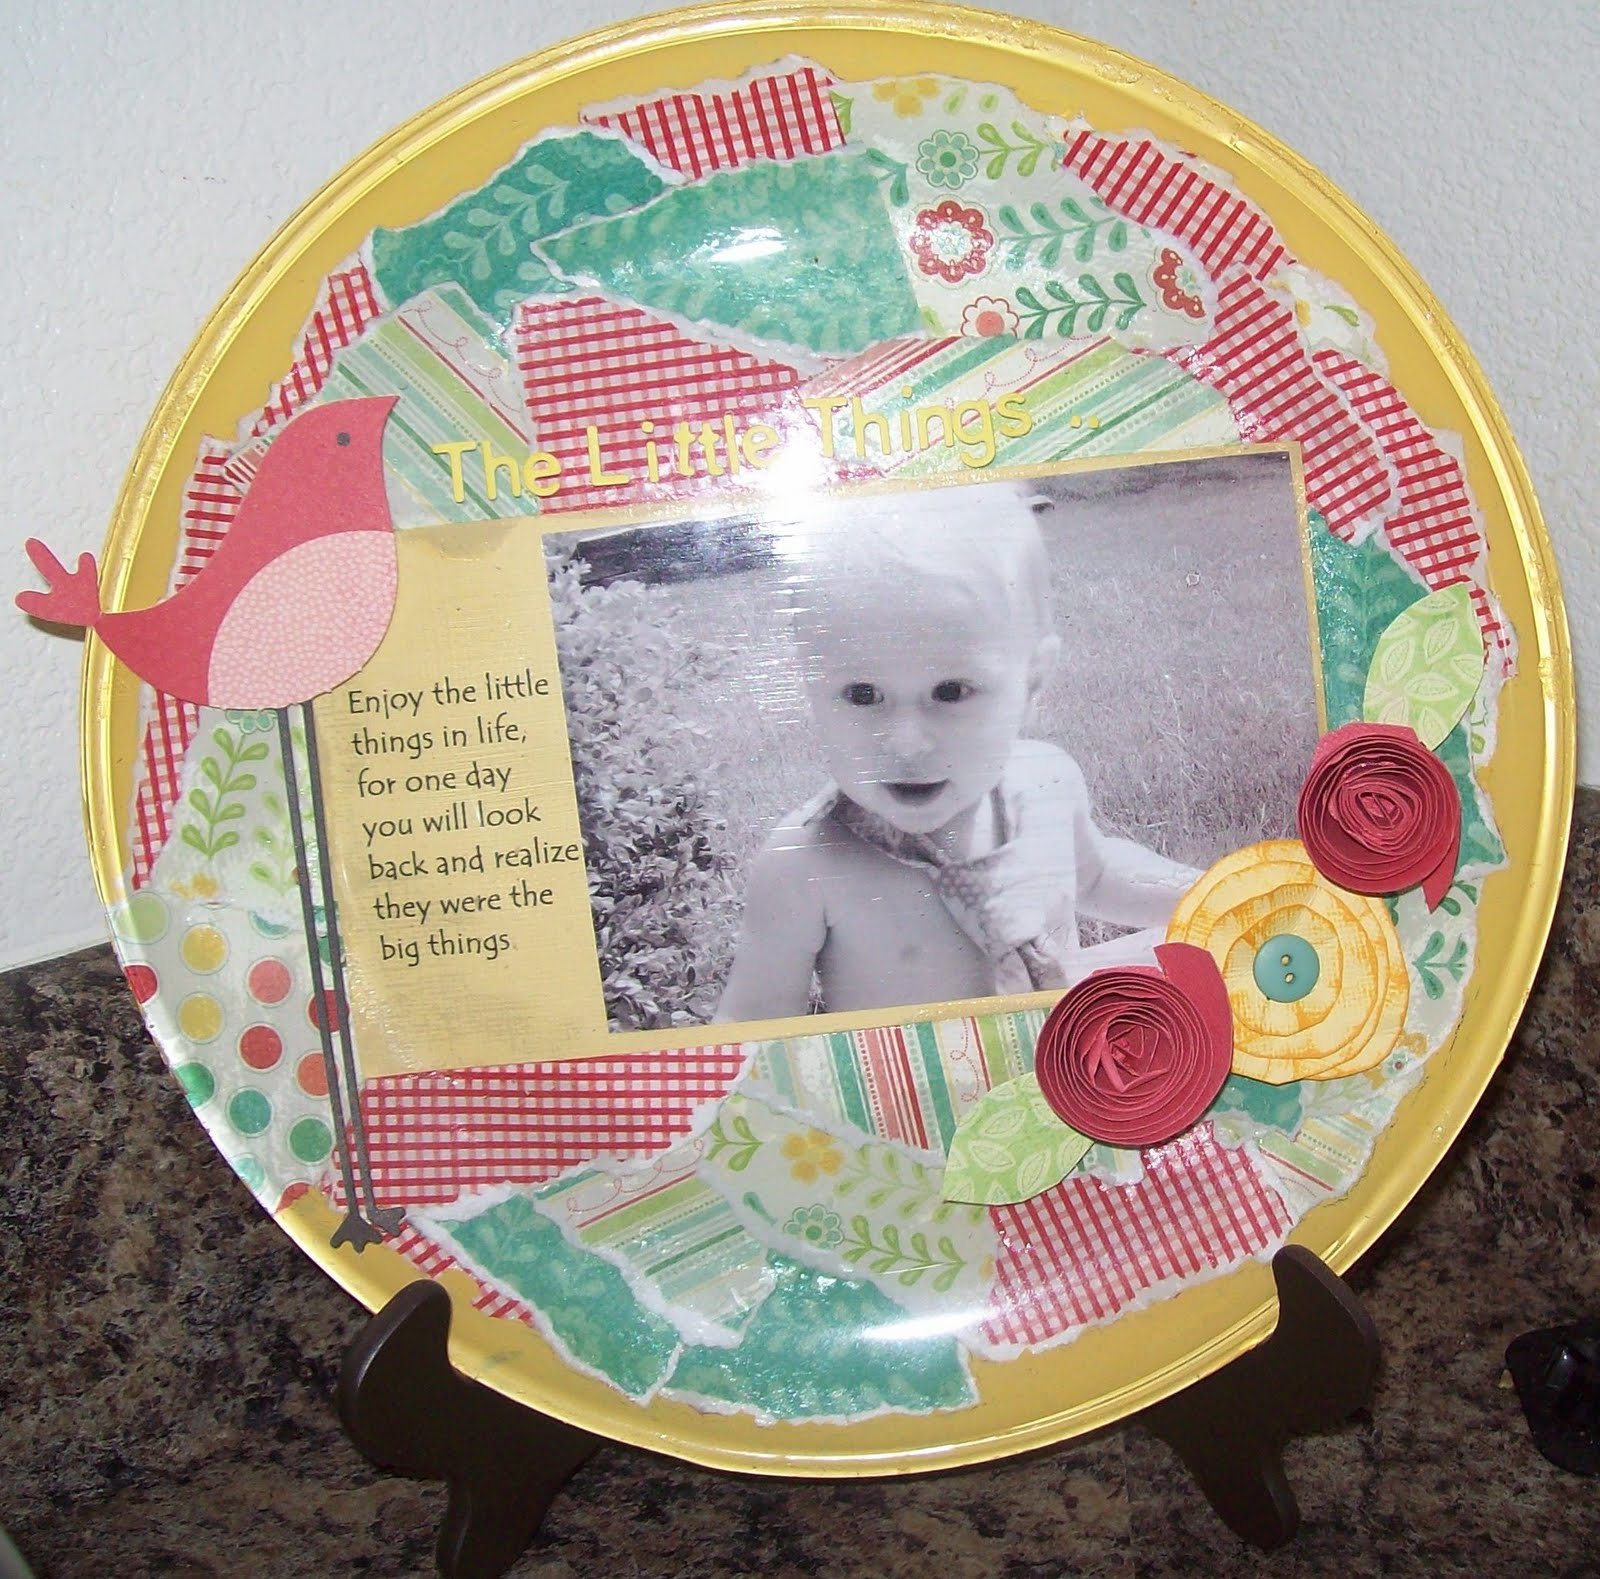
Materials Needed: 1. Buy a glass plate. I bought mine at Ikea for $1! 2. Scrapbook paper 3. Modge Podge (Glossy) 4. Sponge brush 5. Black Paint 6. A photo (Black and White or Sepia looks the best). 7. Embellishments How to: 1. Turn your plate upside down and paint the center of your plate and adhere your photo to it with Modge podge. 2.Tear off strips of scrapbook paper. I used three different sheets. 3. Glue on the teared pieces of scrapbook paper. 4. Cover the plate until all that you have left is a border. 4. Paint the border and the entire plate. 5. Let paint dry 6. Paint it over with more modge podge. 7. Let it dry 5. Make a Halloween flower
Halloween Flower 1. Trace three circles on paper. (large, medium, and small circle) Use three different sheets of scrapbook paper. 2. Cut circles out and crumple them up in your hand. 3. Open circles up and rub creases with antique ink 5. Put it all together with a cute brad. 6. Use pop dots to adhere to plate.
Other Embellishments: Use orange jewels and put them around the border of the plate and last but not least adhere the jeweled wording to your photo. I found mine at Heartland Scrapbooking store in Ladera Ranch, CA.
Now go grab yourself a couple pieces of CANDY out of the Halloween bowl and Have FUN making your Halloween plate.
My good friend Shannon makes these ADORABLE wood letters and they are SO CUTE!!! I have been wanting to make one for Emma for quite some time and when Shannon posted a step by step tutorial I decided to go for it and make one for Emma.
This is how I did it: 1. Buy some wood letters. I bought mine from a Utah scrapbooking store called Heartland Scrapbooking in Taylorsville. You can order them from anywhere and they will ship them to you. I LOVE this store!!!
2. Find some scrapbooking paper that goes with the theme of your child's room. It took me FOREVER to find the right kind of paper for Emma's room. I finally found a cute pad of paper from Joann's. I love the pads because all of the paper coordinates.
3. Turn your letters upside down and trace them.
4. Cut them out and set them aside.
5. Paint your wood letters. Let them dry in between coats, give them at least 2 to 3 coats.
6. Let the paint dry for 24 hours.
7. Use Modge podge use glossy rather then matte.
8. While modge podge is still wet put traced paper letter on wood letter. Gently push out air bubbles, let it dry slight. One of my letters was messed up so I let it dry slightly and then I gently pulled it up and applied more modge modge and pressed back down.
9. Dry overnight.
10. The next day your going apply another coat of modge podge over the papered.
11. Allow them to dry for about an hour.
12. Then embellish your letters. I made paper flowers and used ribbon. Using three different papers trace three circles, each slightly larger then the one before. I cut and crumpled them up and then rubbed the creases with an antique stamp. You can find the antique stamps in the scrapbooking section of any craft store. I placed a jewel brad in the center of the three flowers. I used pop dots to attach the flower to the letter.
14. After you have completed your embellishments put them on your letters and you are done!!!
I love all of Pottery Barn Kids merchandise!! I even LOVE sometimes even more the things they display in their magazines but don't sell in their STORES. This makes it really HARD for me because SOMETIMES I NEED/WANT what they have but is not for SALE to us. For EXAMPLEThis cute UTENSIL HOLDER they do not sale it. So what's a MOM to do?? Invent one similar to their's of COURSE!!
Do you WANT to MAKE one for your little ONE?? Well read on if you would like to know how. SO EASY and SIMPLE and CUTE!!!
1. In you pantry find a tin can. I used an apple sauce can. Carefully peel off the wrapper and set it aside.
2. Empty and wash the can
3. Take the wrapper that was from the can and trace it on scrapbook paper.
4. Cut out your traced paper.
5. Take your can and a sponge brush and paint the can with gloss modge podge.
6. Take your scrapbook paper and wrap it all around the can.
7. Let it dry for an hour.
8. Paint over the can with modge podge one more time and let it dry.
9. Last but not least, put all of your kids cute cooking untensils in the can and place it in there kitchen. They will LOVE it and so will you!!!!
Designer Spotlight: Yellow Birdie Stitches
-
If you love to cross stitch bookmarks, Yellow Birdie Stitches is the Etsy
shop for you. The shop is based in the UK and almost all of its designs are
boo...
Weekly Meal Plan 7-12-26
-
[image: A recipe photo collage of a weekly meal plan for I Heart Naptime.]Using
a weekly meal plan will save you time, money and reduce stress at
dinnertim...
Easy DIY Red, White & Blue Hot Dog Serving Trays
-
Make hosting simple with these easy DIY hot dog trays! Perfect for backyard
BBQs, picnics, and Fourth of July parties. A fun, budget-friendly serving
ide...
Seasonal Coloring Pages
-
Seasonal Coloring Pages: Celebrate the Year with Creative Fun Seasonal
coloring pages are a fun way to celebrate every time of year. This
collection incl...
33 Top Adult Party Themes
-
[image: 30th Birthday Party Ideas]
Hosting a birthday party for adults is now more fun than ever! These are
the best adult birthday party ideas and themes ...
Banana Split Pudding Cups
-
Banana Split Pudding Cups (No Bake Dessert Kids Can Make!) Looking for
a fun dessert that keeps kids busy and happy? These banana split pudding
cups are ...
Chicken Wire Ghost Tutorial
-
These spooky Halloween decorations are ghostly outlines made from chicken
wire. These chicken wire ghosts have become my all time favorite Halloween
deco...
100 Things to Put on a Charcuterie Board
-
What is a charcuterie board? Charcuterie boards (also known as snack
boards) are usually filled with meats, cheeses, veggies, nuts, olives,
dried fruits,...
How to Install a Corkboard Wall
-
I installed this corkboard wall in a matter of hours, so I happily pass on
the tutorial to you! The hardest part was just worrying about whether or
not i...
A Fond Farewell
-
I am writing today to say farewell to blogging.
I have loved this blog.
I started *The Shabby Nest* in 2008, and it has been a source of joy, it
has prov...
How to BEND A BASEBOARD around a tight curve
-
Today I’m sharing how to bend a baseboard around a tight curve. We have a
curved staircase which is beautiful to look at but also made for a
challenging ...
Thoughts for the New Year
-
When you go through really tough stuff, loss, extreme sadness or grief, you
feel like the pain is never going to stop. You can’t imagine a day where it
w...
Y Yigal for Macy's
-
I came home from Thailand to a very nice surprise at my doorstep
compliments of Popsugar and Macy's!! Affiliate links are used throughout
this post.
Wo...
Oh Whale!
-
Over at Hand Stamped Sentiments we have a sketch challenge this
week. Today's card was so fun to put together. Mostly for the reason that I
got to use som...
goodbye...hello ♥
-
Things sure have slowed down here at Seven Sisters...although you might
occasionally see a post from one of the sisters from time to time :)
...and gues...


.png)