Showing posts with label decor. Show all posts

Wednesday, January 26, 2011

Robot Picture

If you like vintage robots then your going to LOVE this!!! My son when he gets a room of his own I plan on decorating his room with vintage robots. Would you like to have this picture for only a $2 to $3!!! (I can't remember how much excatly, but it's cheap.) All you need to do is go to Google and type in Vintage robots and this picture should come up. Copy and paste the picture and go print it at Costco. I found this neat idea at http://www.restlessrisa.blogspot.com/

Monday, January 24, 2011

STAY TUNED :) Magnetic Picture Frame!!!


After


BEFORE

What do you think I'm going to do with this old frame?????

To be continued...................
Do you want to make one of these for a special someone in your life or for you??? Well because I love you all I will tell you how I did it.
1st Step: Find an old frame that you have been thinking about throwing away. Or go to a thrift store.
2nd Step: Give it a face lift: Paint it your prefered color. White was the color I chose for my frame. Give the frame 3 coats of paint.
3rd Step: To give it a antique sand paper the frame after it has dryed.
4th Step: Go to LOWES and get yourself a 8*10 sheet of magnetic metal. Make sure to ask them for the stuff that's only a $1!! If you ask them to cut it down to 8*10 they will because they are so NICE!!!!
5th Step: Cover the sheet of medal with modge podge and place your pre-cut sheet of paper on it. Give it another coat after you have adhered it to the sheet of metal. Cut about a 1/4 of your other sheet of scrapbook paper and adhere it to the bottom. Cover it with modge podge again.
6th Step: Adhere down your ribbon with modge podge.
7th Step: Adhere your magnets with a hot glue gun to your jewels.
8th Step: Pick out some cute pictures to put on your frame. What's fun about this is you can change it up whenever your want. :)
I would like to give a big thanks to a very crafty lady for giving me this great idea!! Here is her blog address: http://www.Iheartnaptime.blogspot.com
Happy Crafting!!! :)

Tuesday, November 23, 2010

Picture Frames


Sunday, November 14, 2010

Thrifty Christmas Gift


Materials:
1. Glitter Glue ($1) You can find this at the Dollar Store.
2. Happy Holidays Snowman Sign ($1) Dollar Store

How to: Take your sign and turn it into a Glitter Winter Wonderland Sensation!!! Use Red and Silver :)


Wednesday, November 10, 2010

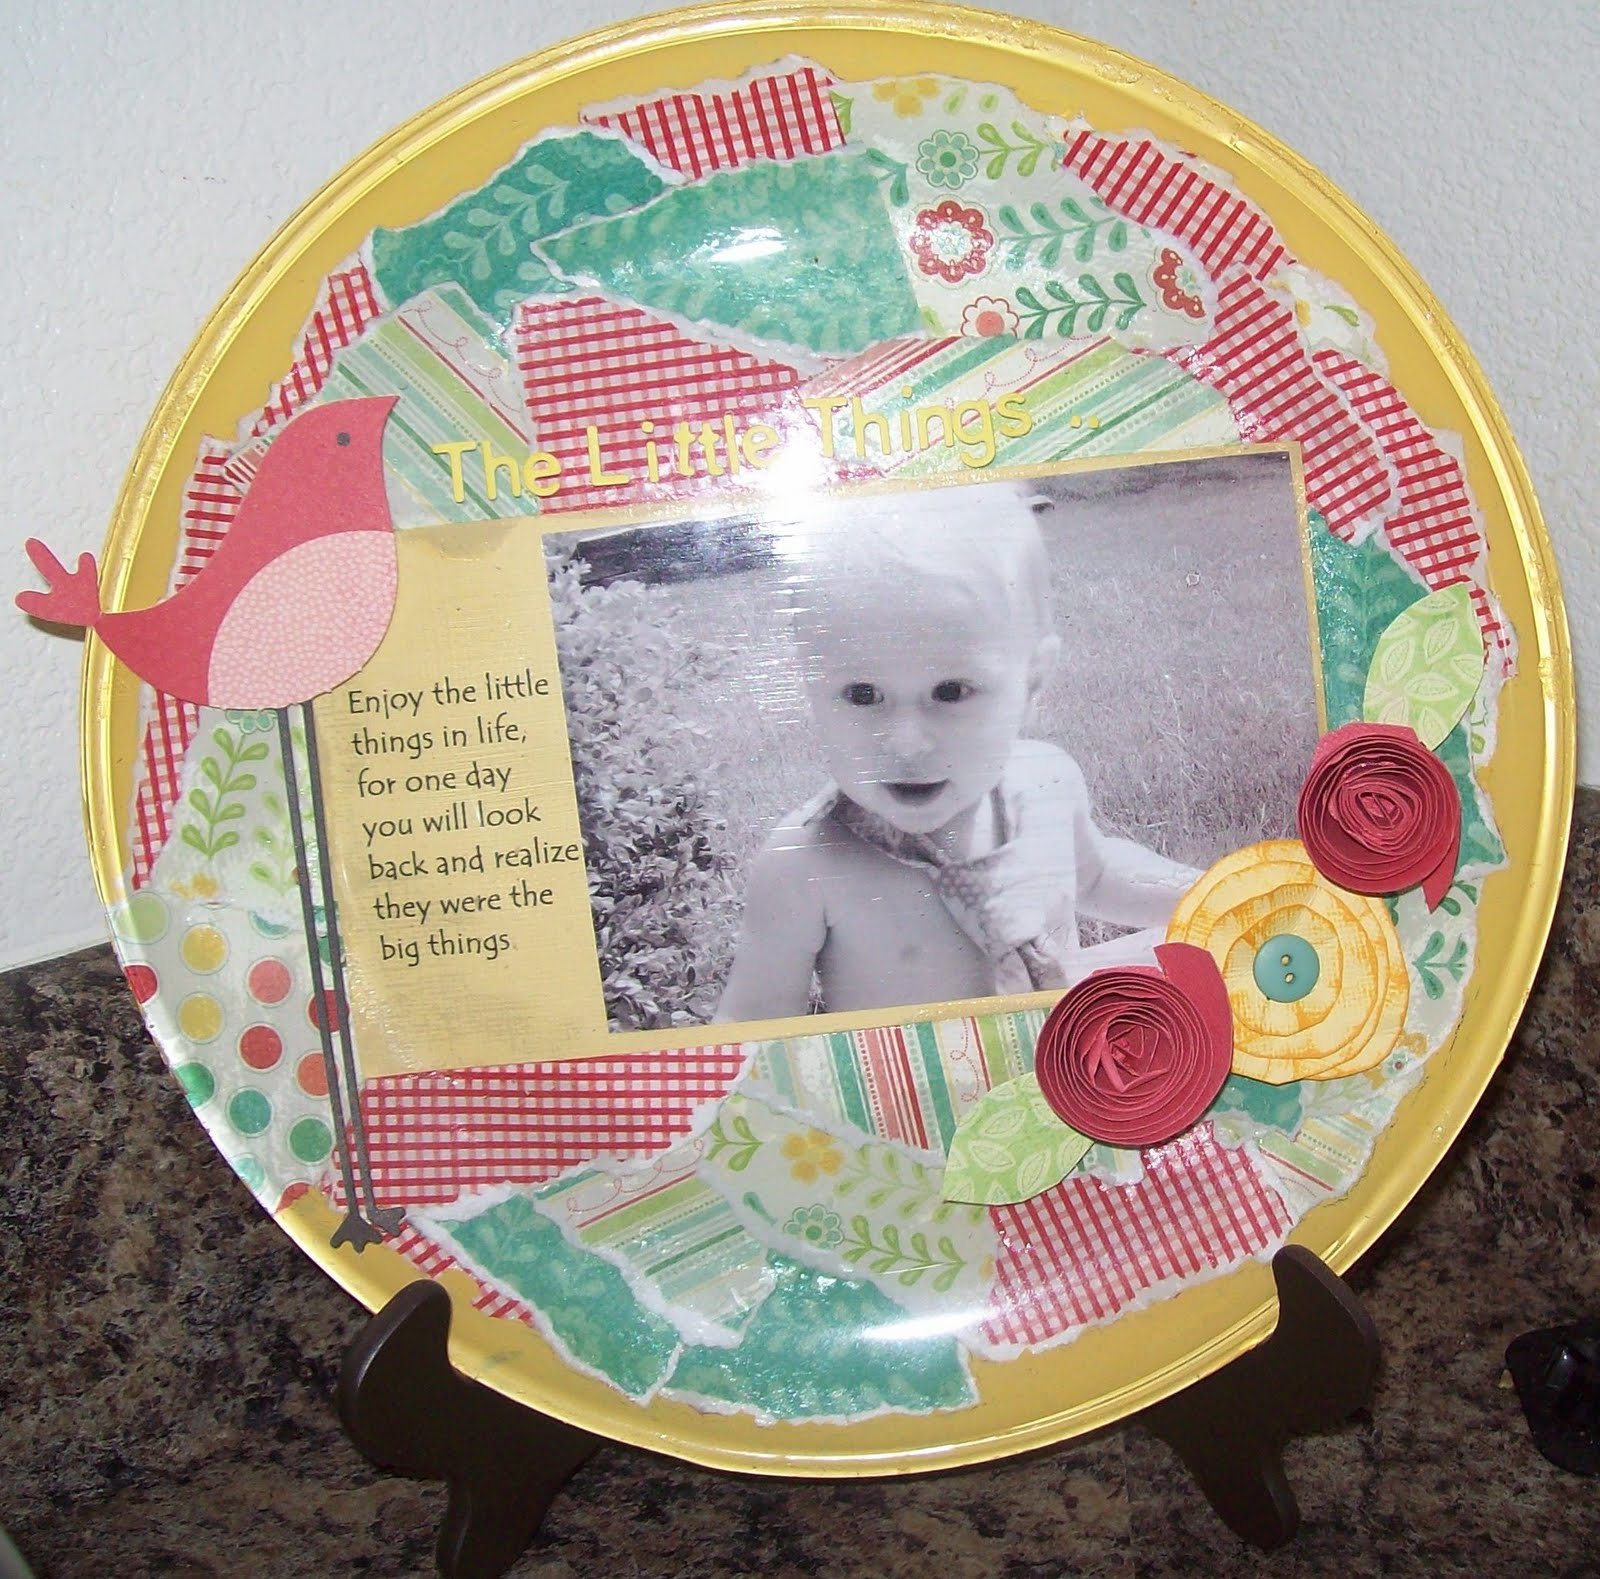
Christmas Decorative Plate


Materials:
*Ikea glass plate- $1
*Glossy Modge podge
*Scrapbook paper
*A sheet of cardstock (For the Quote)
* Paint (Christmas color)
*Paintbrush and a Sponge brush
*Christmas photo (Black in White)
*Embellishments

I used this quote:

In the eyes
of children we
find the joy
of Christmas. In
their hearts we
find it’s meaning. (Print it just like this on cardstock for your plate.)

1. Wash and dry your plate
2. Print your quote on cardstock
3. Glue on your 3 ½ x 5 photo on your cardstock
4. In a bowl pour some modge podge into it.
5. Turn plate upside down.
5. Paint modge podge right in the center with your sponge.
6. Place cardstock that you have already glued on, onto your plate. Then cover it with some more modge podge. Then with a rag push down to get all of the air bubbles out.
7. Take three different sheets of scrapbook paper, but make sure they coordinate for your plate.
8. Start tearing tiny pieces and glue them on your plate. Use a rag to push out the air bubbles.
9. Keep alternating between your three sheets of scrapbook paper.
10. Leave about a inch of your plate (The border for paint)
11. Paint the border and the entire plate your choice of paint. Your might end up painting it twice.
12. Let it dry
13. Paint it over with Modge podge and let it dry.
14. Embellish it!!
15. Buy a plate stand to display it
Give this to someone you love for Christmas!! They will love it.

Candy Cane Holder


Materials:
Scrapbook paper
Soup can
Candy Canes
Embellishments

How to:
1. Find a tin can in your pantry
2. Take off the soup label (Carefully, your going to use the label as your template)
3. Trace the label on scrapbook paper and cut it out.
4. After you have washed your can your going to cover it with modge podge (Glossy) and place your cut out scrapbook paper on the can.
5. Let it dry
6. Go over it with modge podge again
7. Let it dry
8.Embellish your can :) Funnest part!! Adhere them on with modge podge. The pop dots don't stay on the can.

Homemade Picture Frame


Wouldn't this be a fun and inexpensive gift for the Grandparents?!? for CHRISTMAS! This is so easy to make and it looks so CUTE when finished. 

How to:
1. Place your wooden frame on the back of your scrapbook paper. I found mine at Michaels Craft Store So there is no pen marking’s on your paper. Trace the inside and outer part of your frame. Cut out the outer part and fold paper and make a snip with your scissors and then start cutting the inside out (This is where your picture is going to be.
2. Paint the edge of your frame. Give it 2 coats and let it dry.
3. Paint your frame with modge podge and place your cutout scrapbook paper on frame. Let it dry and then paint over the scrapbook paper with modge podge. Let it dry and then punch out your embelishments and ink it with vintage ink. Use pop dots to adhere to frame.

Materials:
*Wooden frame $1 (Michael’s Craft store )
*Modge podge (Glossy)
*One sheet of Christmas Scrapbook paper and punch out paper embellishments ( I found mine at my favorite scrapbook store Timeless Treasures.)
*Paint (Dark Red)
* Paint brush/sponge kit ($1) Micheal’s
*Jewels
*Pop dots


Friday, October 8, 2010

Spooky Eye Candles


These were a ton of fun!! I found how to make these cute things at www.heartlandpaper.typepap.com

CRAFT MATERIALS:

Glass votive holders

Black construction paper

Hole punch

Mod Podge

Paintbrush

Black paint


Time needed: Under 1 Hour

1. Tear a sheet of black construction paper into about a dozen small rectangles that measure roughly 1¼ inch by ½ inch. Use a hole punch to add two eyes to each piece.

2. Brush a portion of a plain, glass votive holder with Mod Podge, affix a paper rectangle, then paint more Mod Podge over it. Add the other pieces the same way, making sure the edges overlap.

Eyes


3. When the candleholder is dry, use a tiny paintbrush and black paint to add little round pupils inside the eyes.


Friday, September 10, 2010

Picture plate


I made this at a scrapbooking class in Utah and love it so much that I'm going to make a Halloween version. Stay tuned with a complete tutorial.